So like all good DIY projects, this one started when I wanted to make something special for my girlfriend’s upcoming birthday. I knew that she loved the Moon and all things Lunar related, so after doing some various googling, and coming across ready-to-buy products such as this and this, I finally found something better suited to both my DIY nature and my girlfriend’s uniqueness which was this Lunar Phase Clock!
Now, living in a 432 sq. ft. studio-turned-into-a-2-bedroom- apartment in Manhattan, does not translate to a large amount of space to work on DIY projects, but sometimes having a 35 sq. ft. bathroom and an IKEA NORBERG is all you need.
I took a trip to Home Depot on November 3rd, a full 13 days before my girlfriend’s birthday, which should have given me more than enough time to start and finish the project in time to surprise her…but the real surprise was when I realized how long the project would actually take to complete (spoiler alert: not 13 days).
—————————————————–
Part 1: Physically building it
Step 0) While reading through the instructions, realize that you do not have access to a cheap laser cutter and will need to cut this project by hand
Step 1) Purchase a Dremel tool with 9903 Tungsten Carbide Cutter attachment for the major cuts and the 106 Engraving Cutter attachment for the smaller nooks and crannies
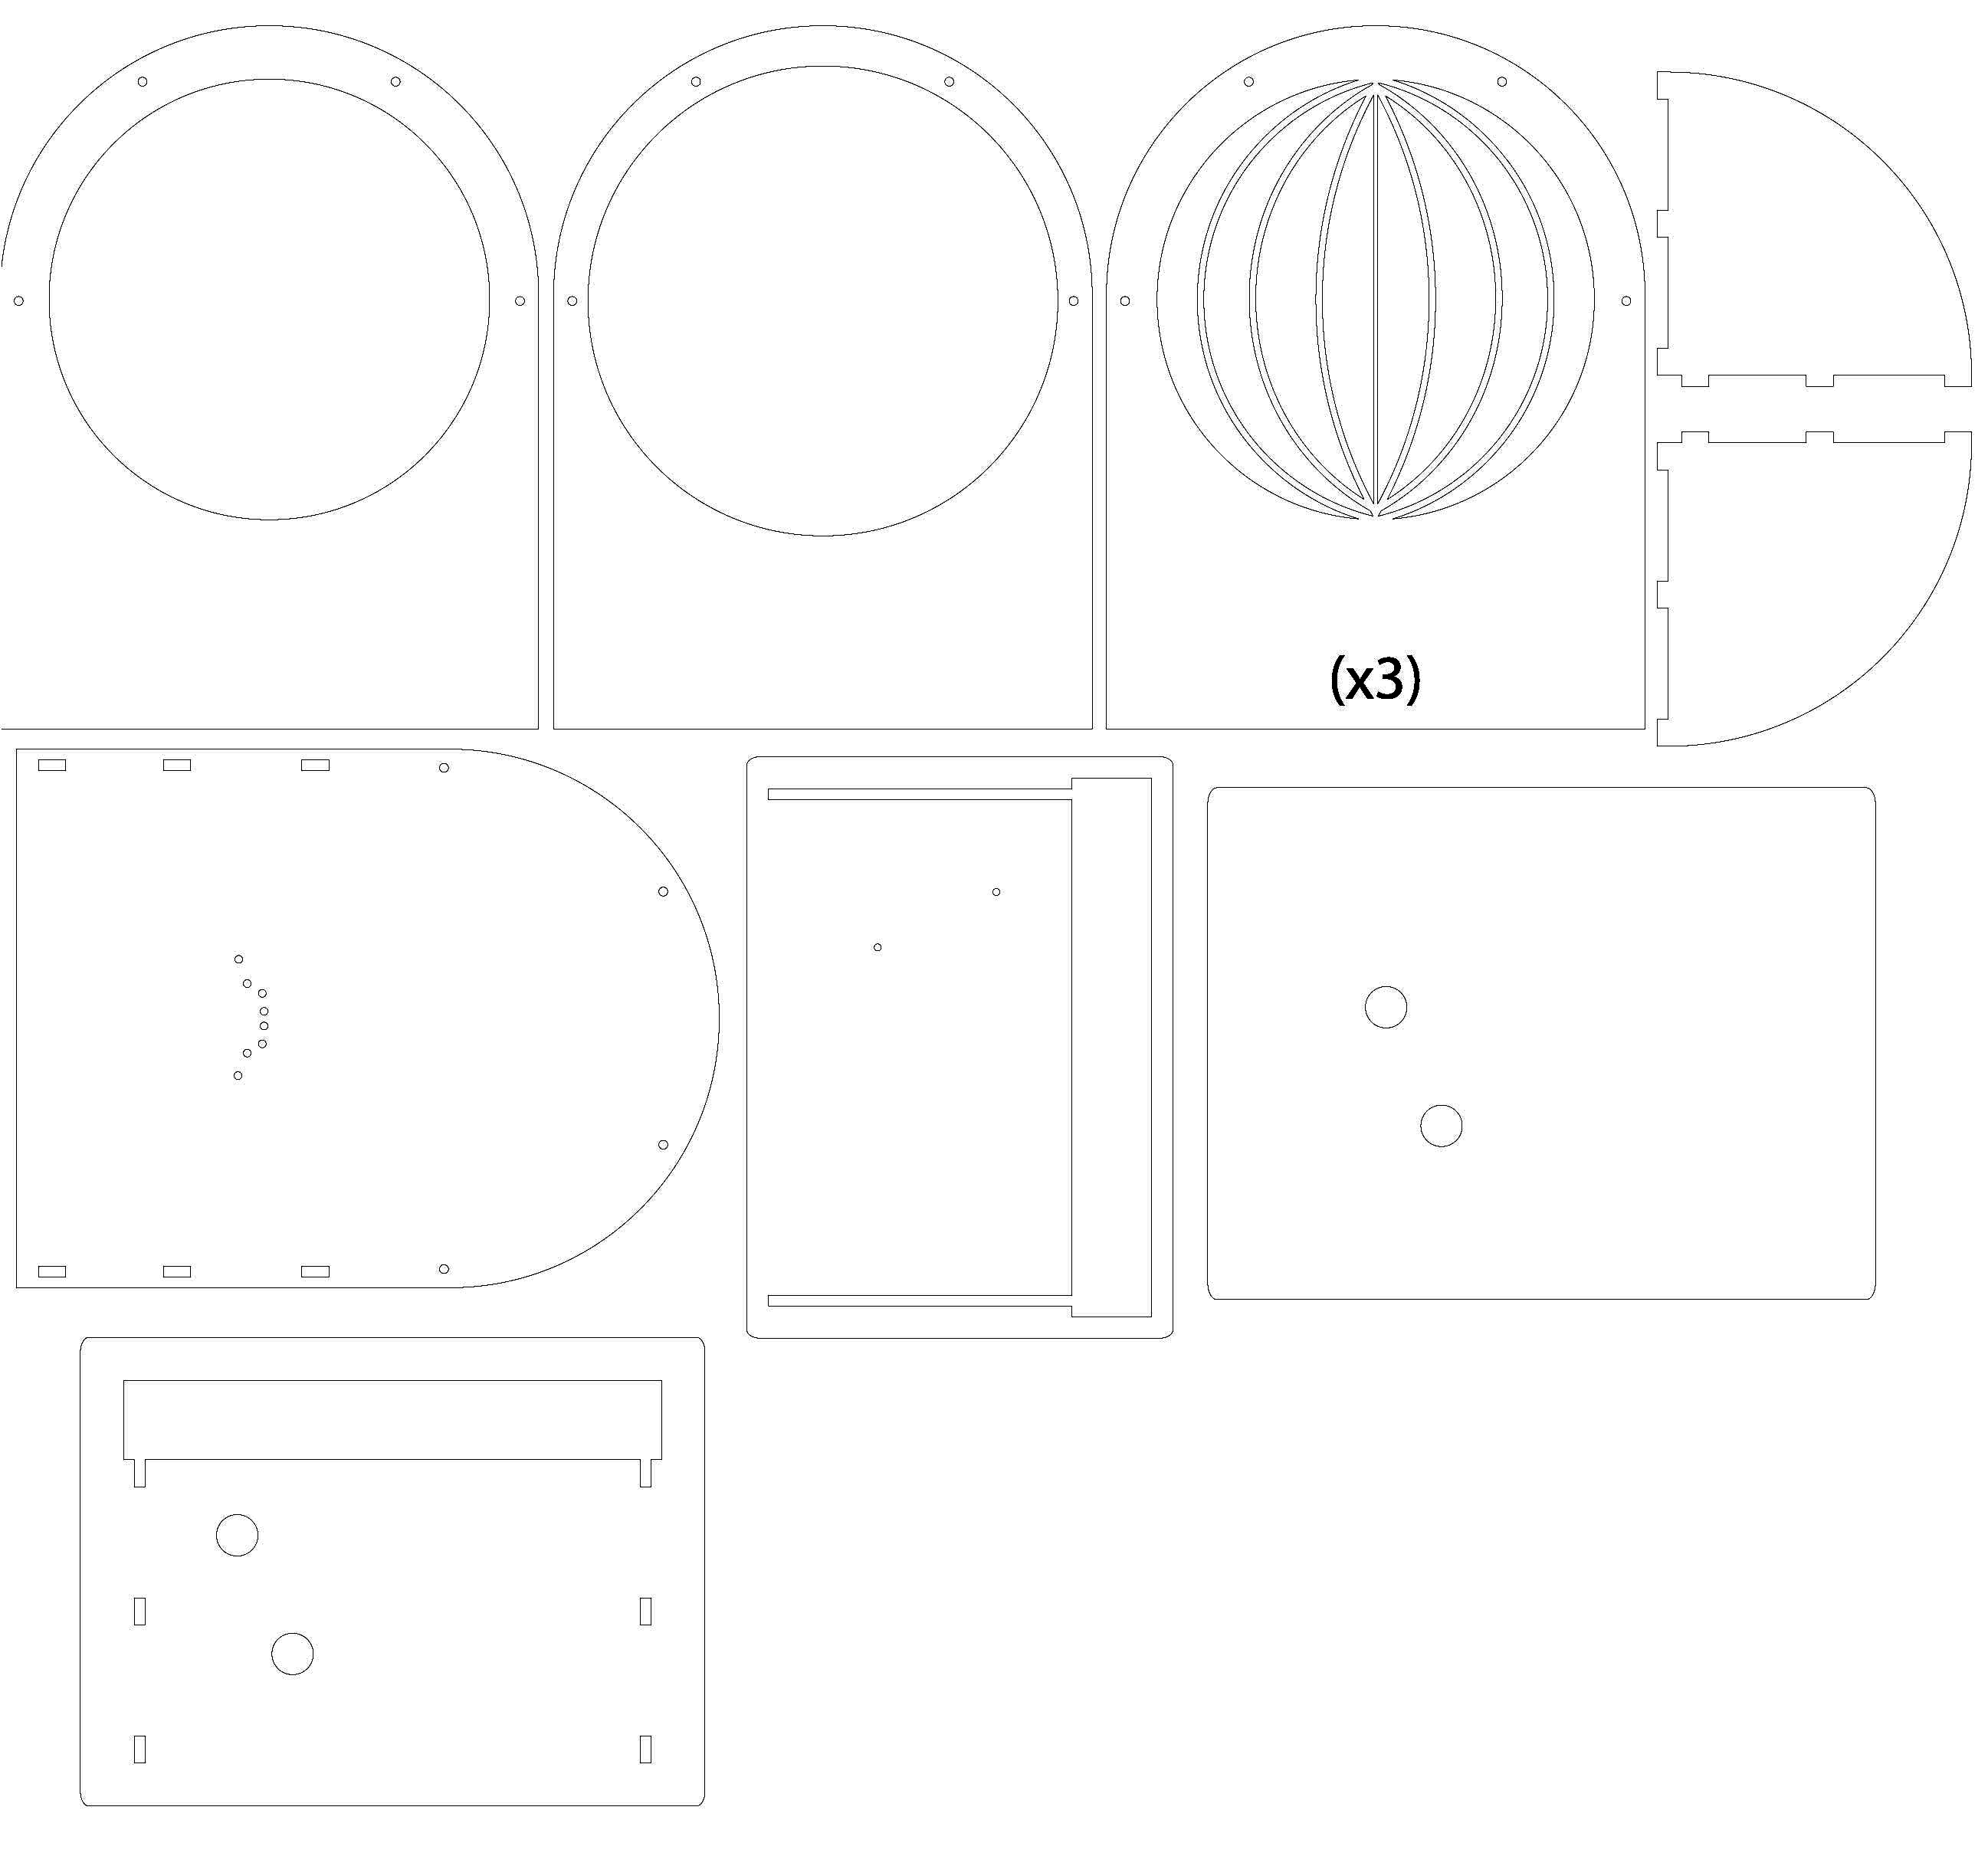
Step 2) Print out the template that is going to be used for cutting
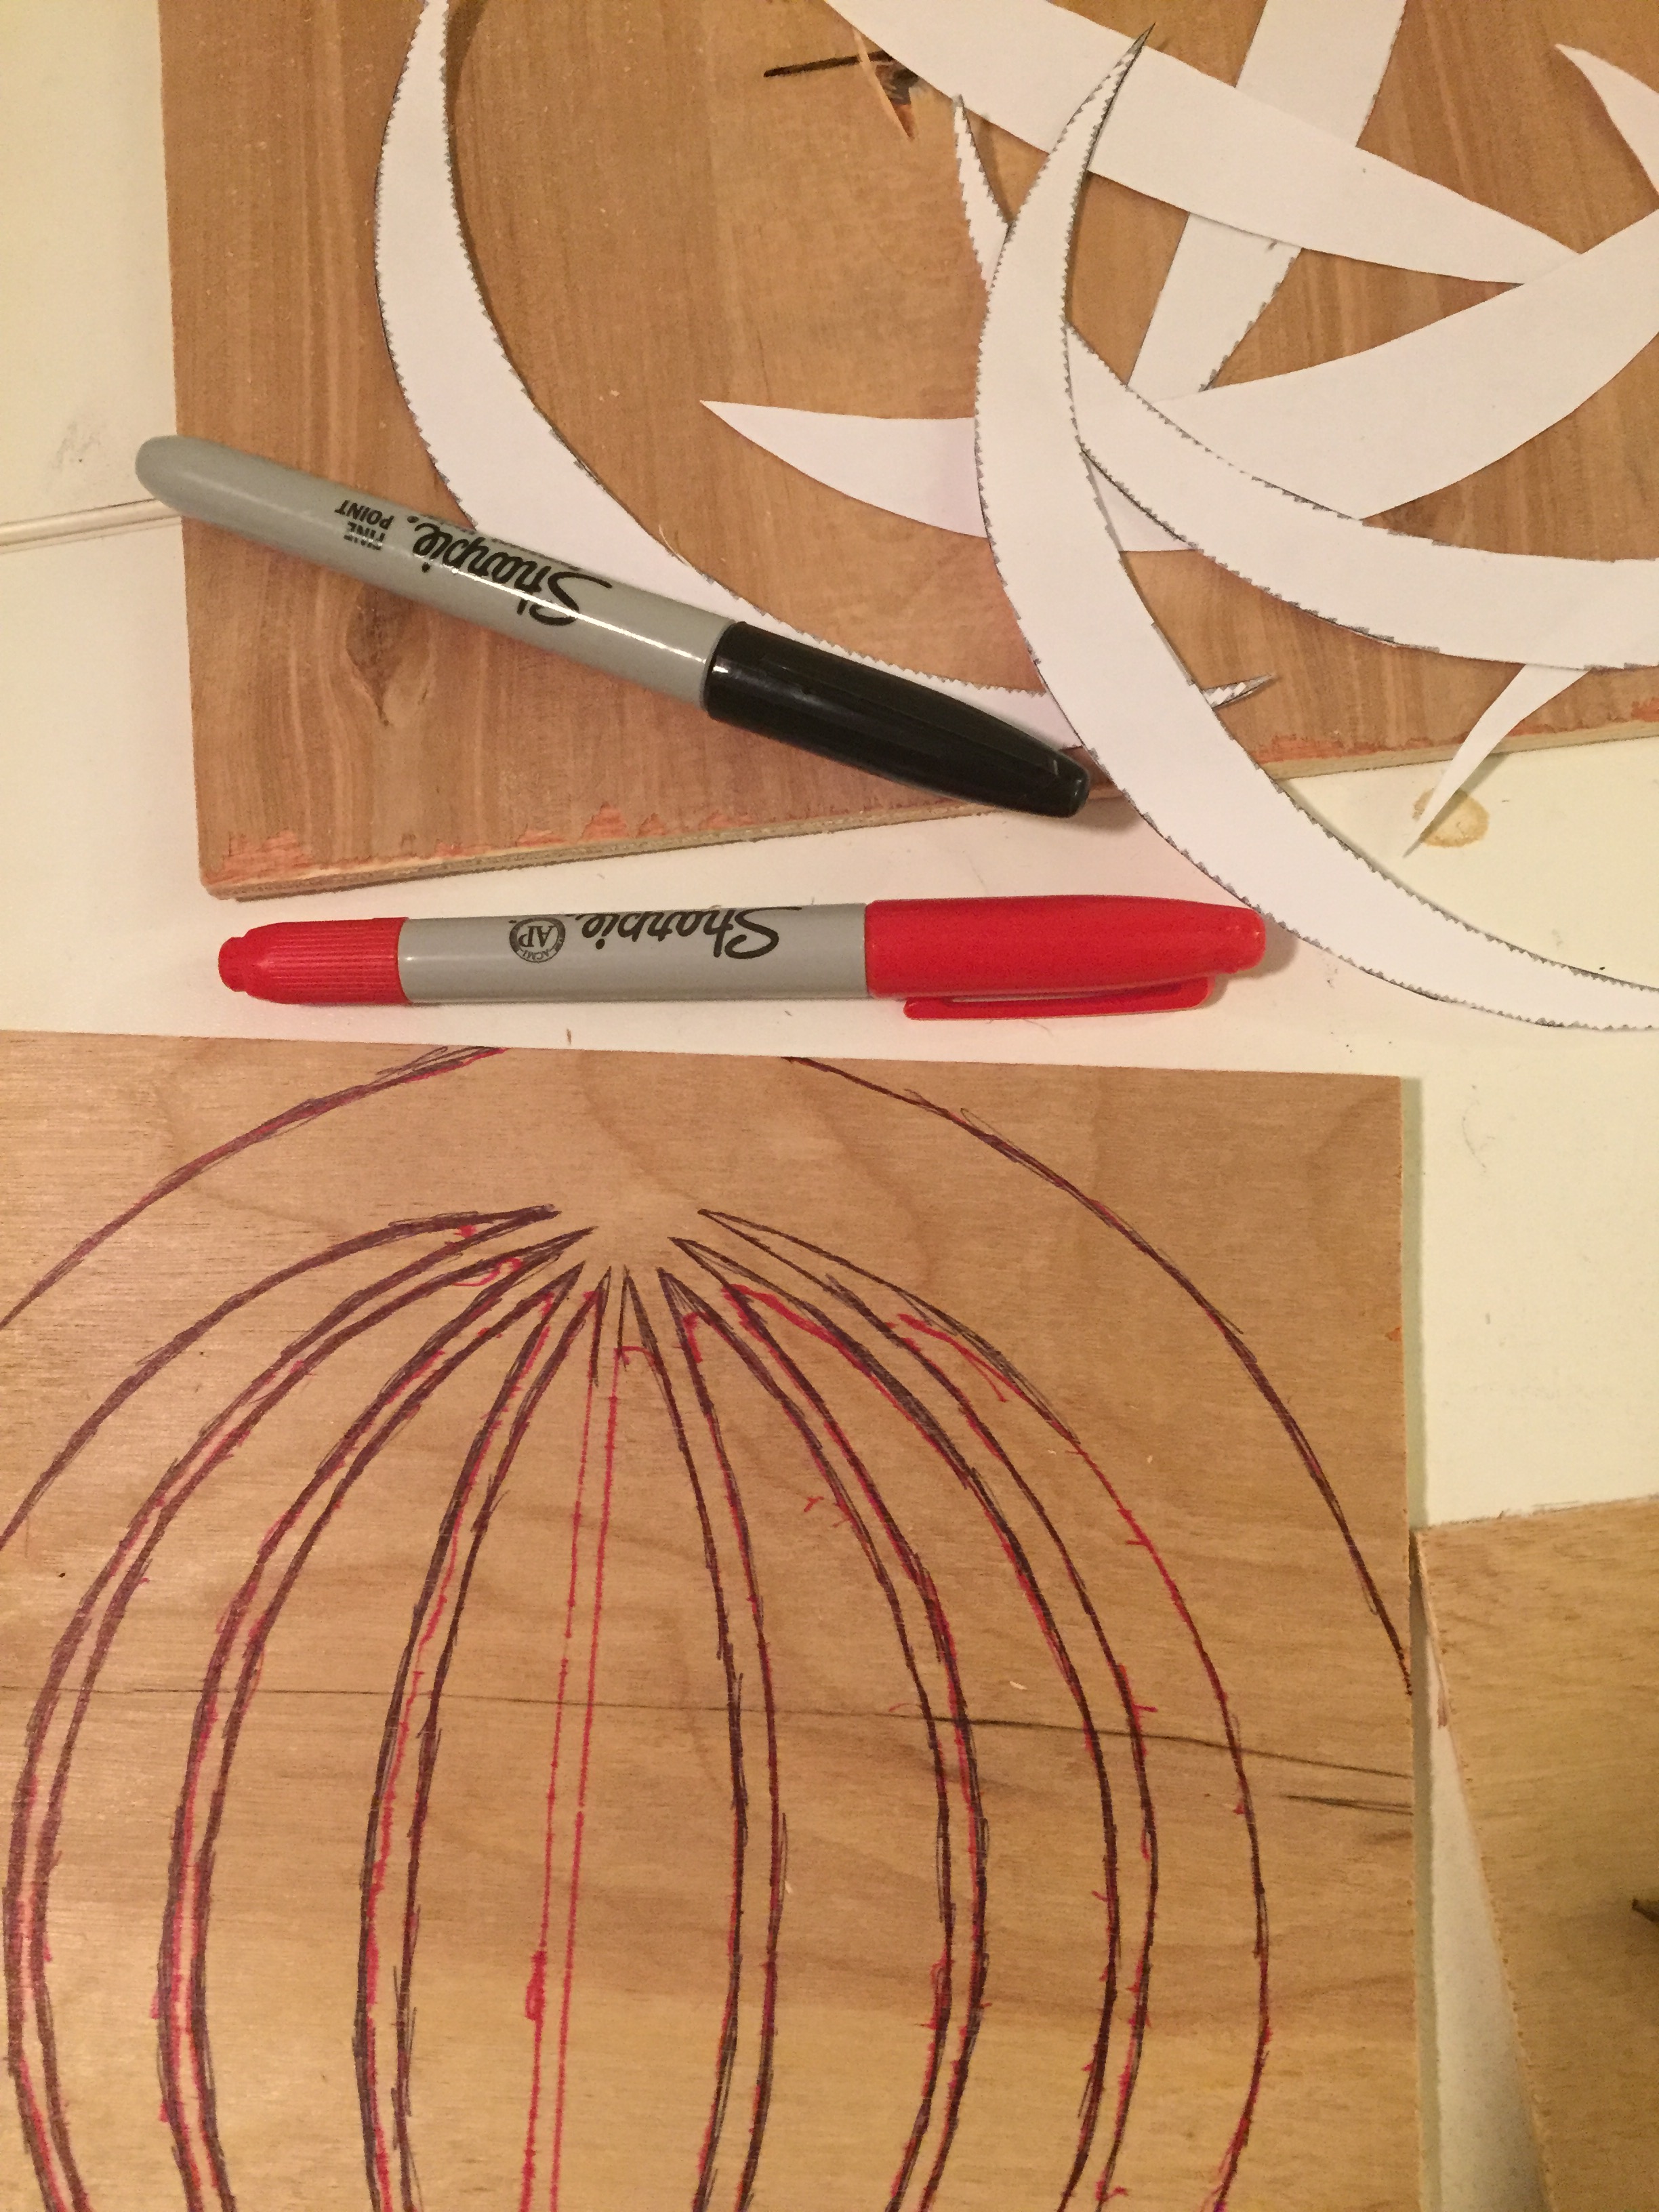
Step 3) Trace the lunar segments onto the pieces of wood
Step 4) Make sure you are properly hydrated and the environment is suitable for the many hours you are about to spend
Step 5) As meticulously as you can, dremel out the 8 moon segments from 3 pieces of wood
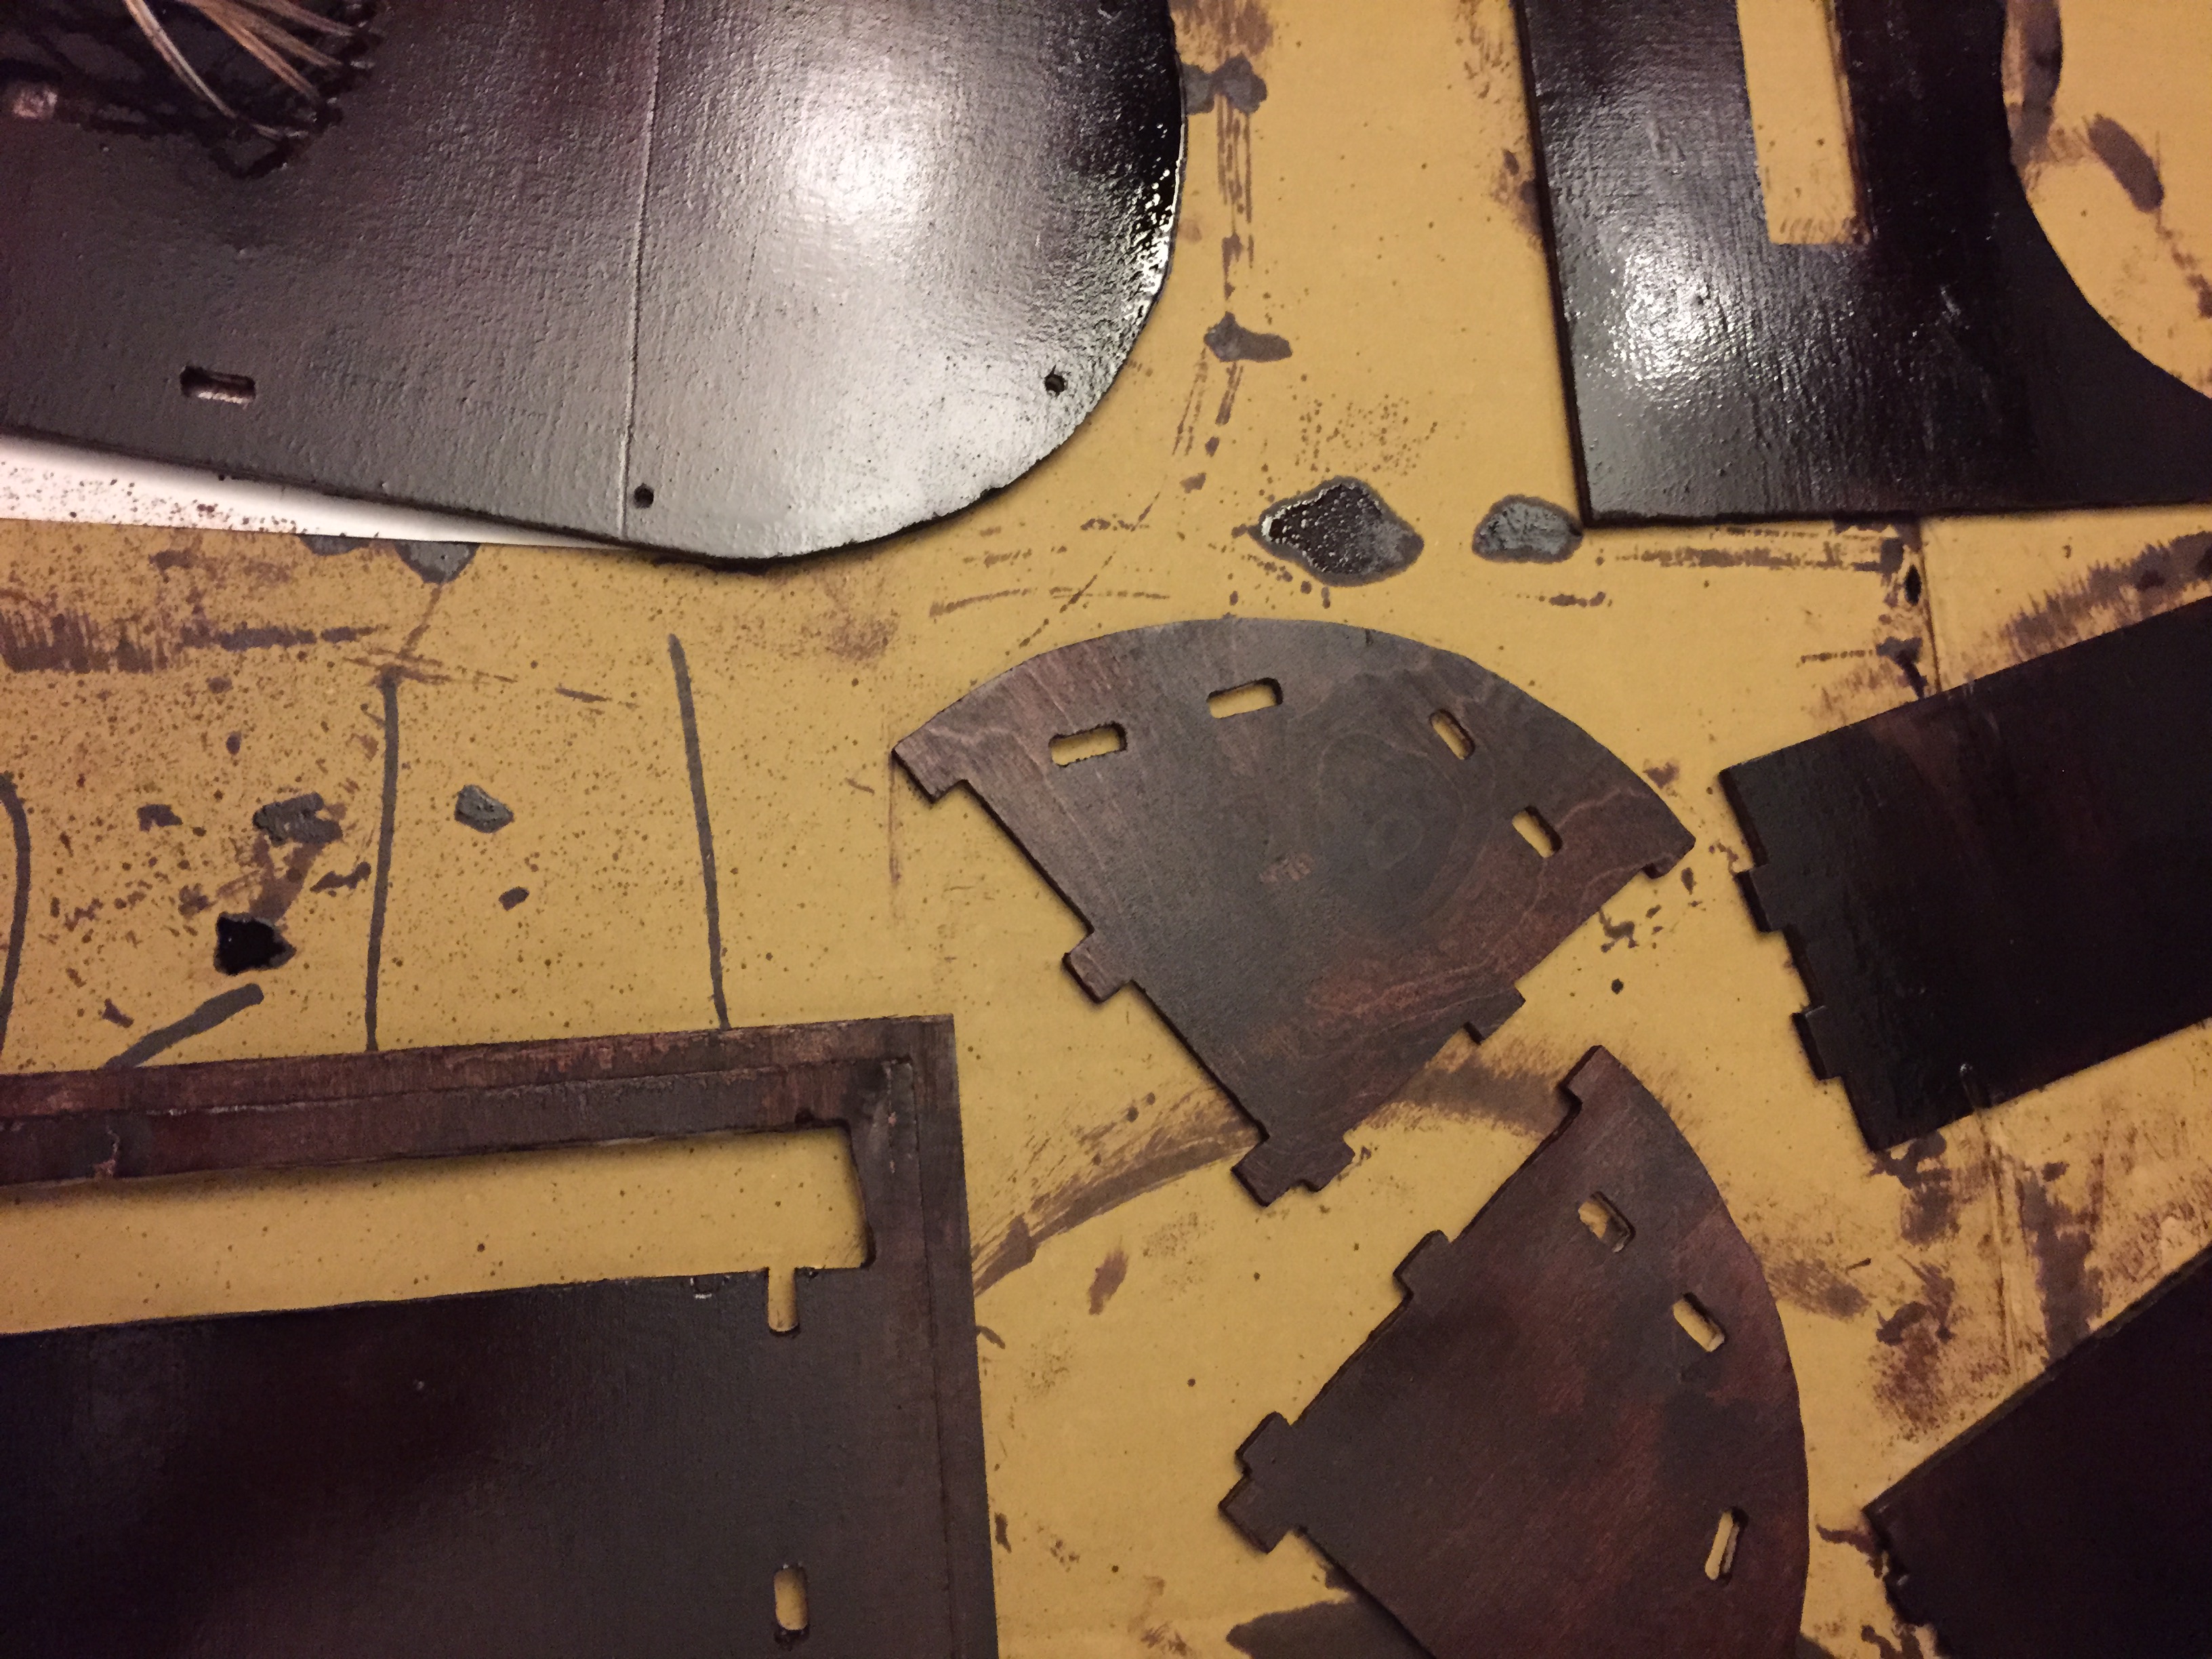
Step 6) Once you admire your hard work, cut out the remaining pieces: front and back pieces, 2 quarter circle side pieces, and the pieces that will be used for the base
Step 7) After everything is cut, stain, but make sure to wipe off the stain after 10 minutes (instead of leaving it to dry overnight which results in a gummy/sticky leftover residue) and to leave a few windows open (unless you enjoy waking up to the smell of wood stain, no judgments)[/vc_column_text][/vc_column][/vc_row][vc_row full_width=”stretch_row_content_no_spaces”][vc_column][vc_wp_text]


Part 2: Wiring it
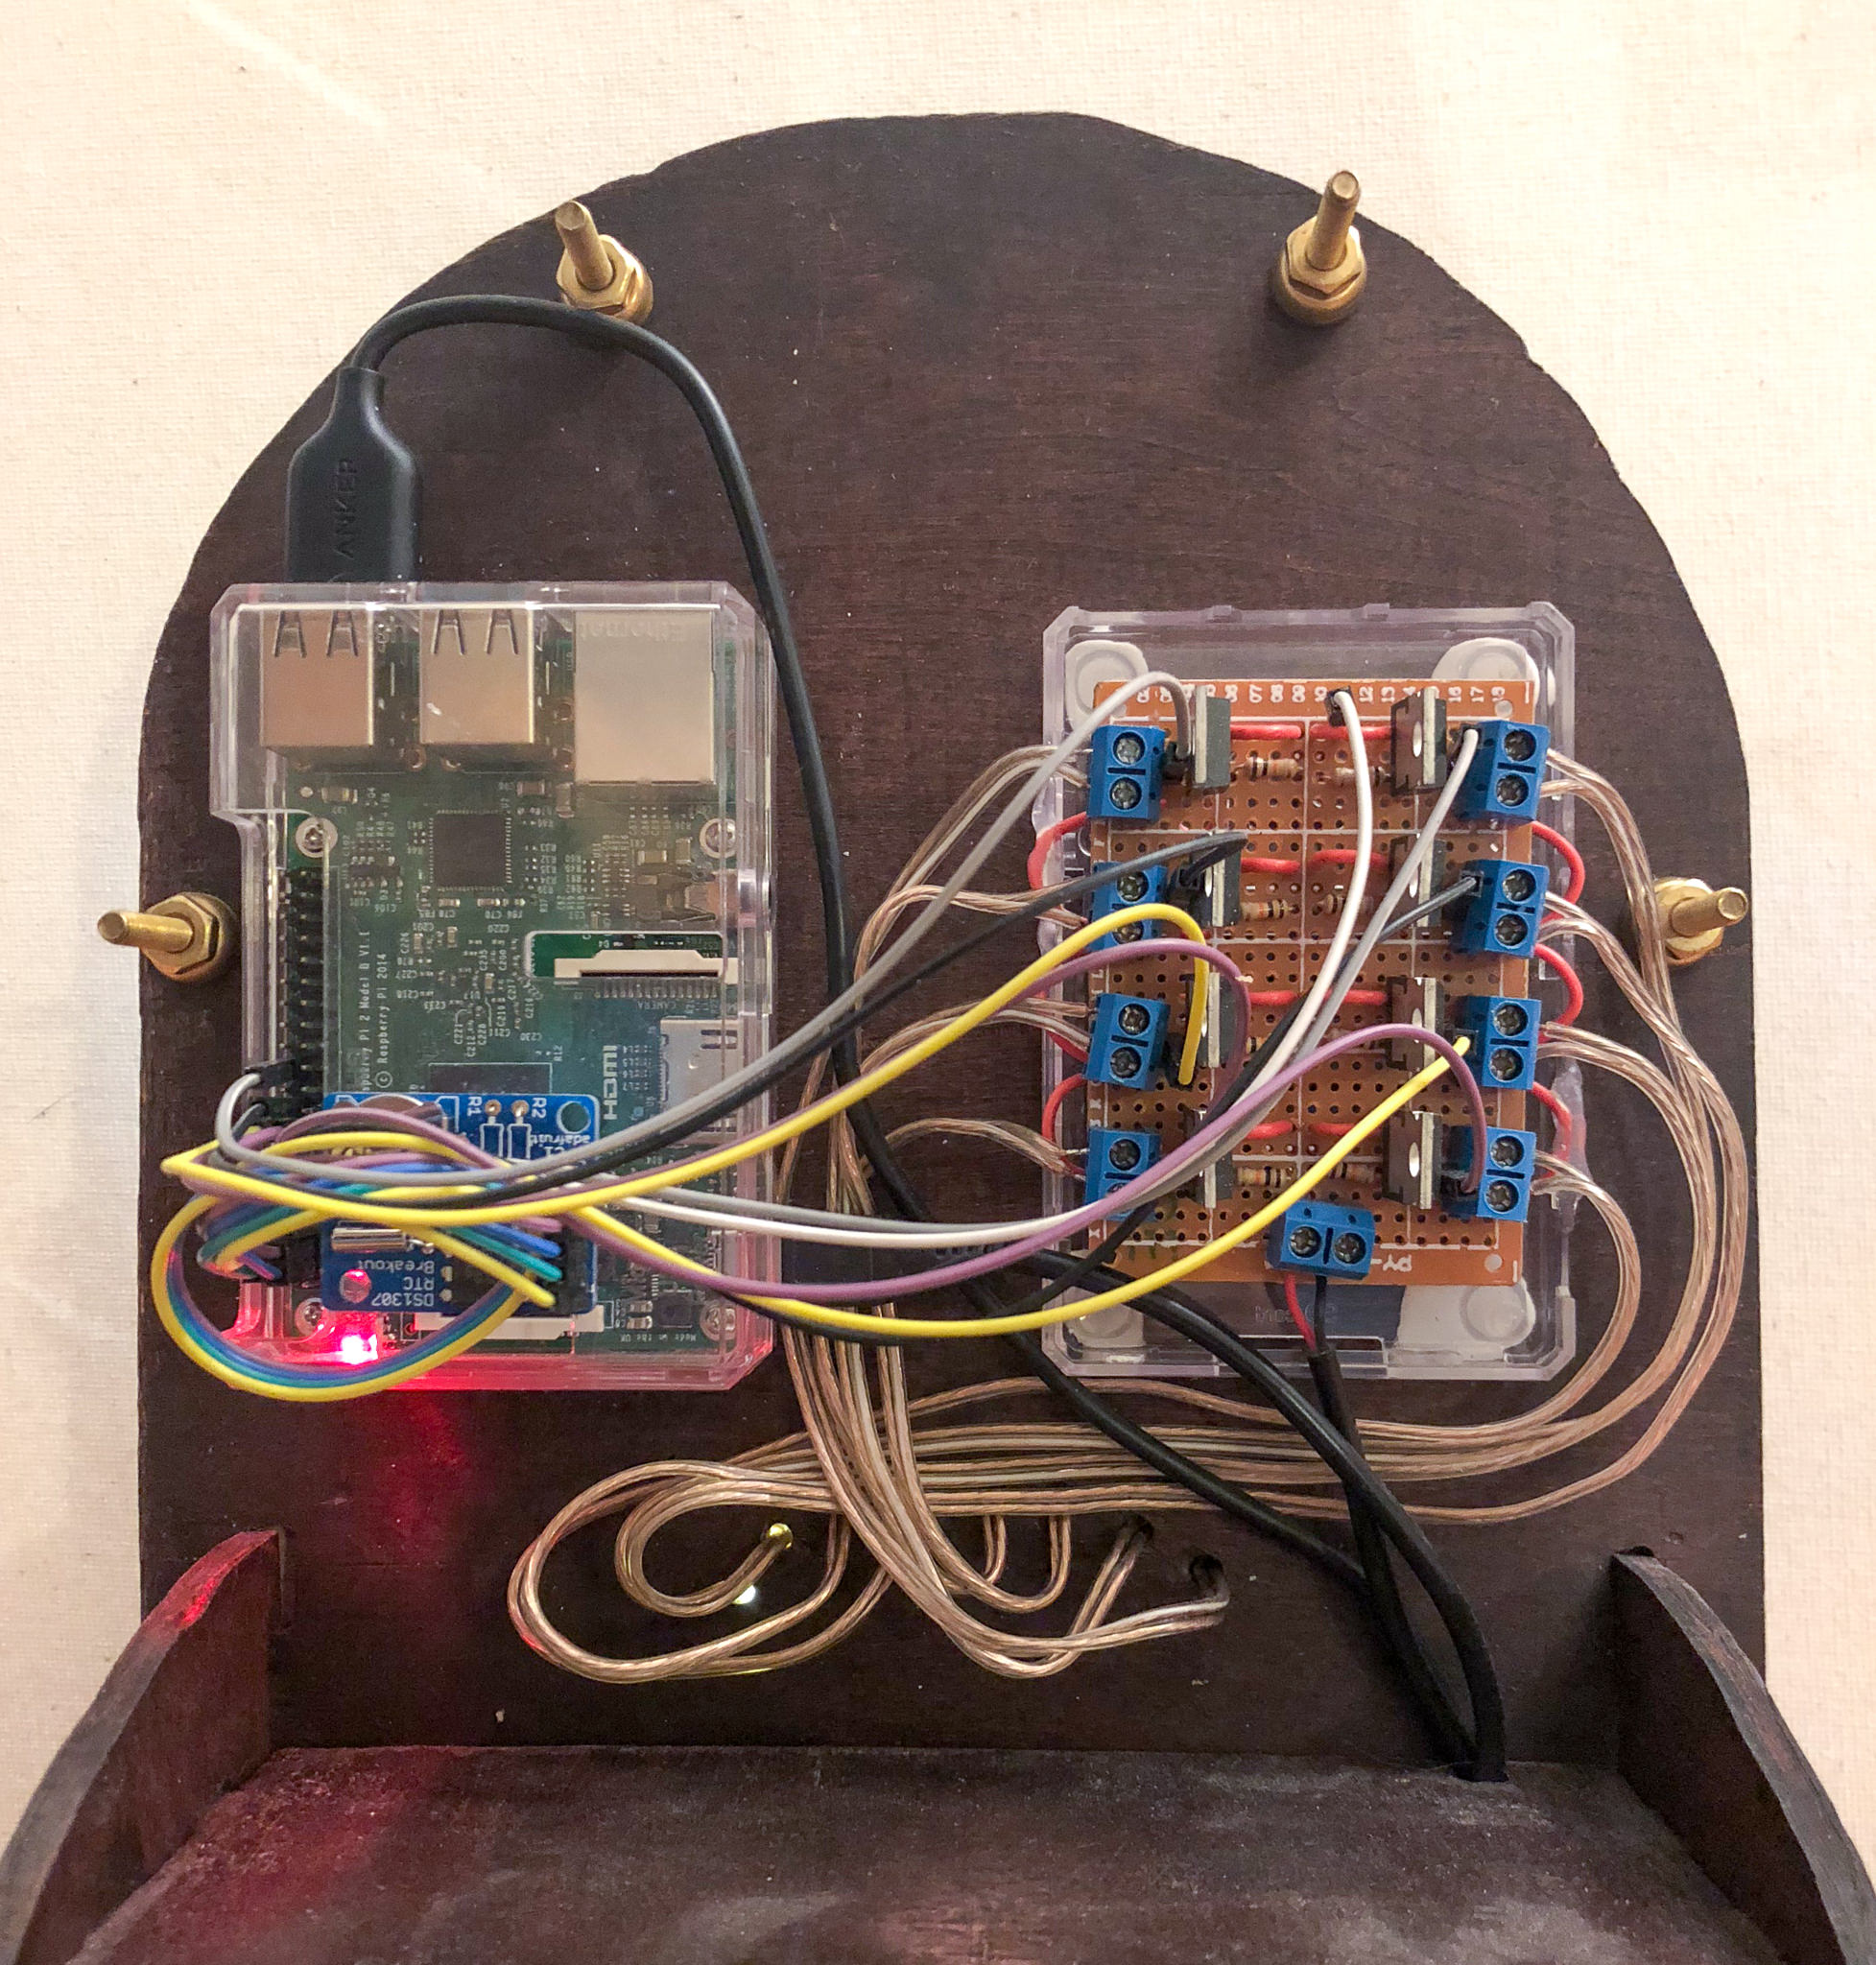
Now that I had the cut, stained, and form fitted wood pieces to build the physical “clock”, I needed to make it actually work. To accomplish this, I started following along with the instructables guide with regards to building the LED driving related circuitry.
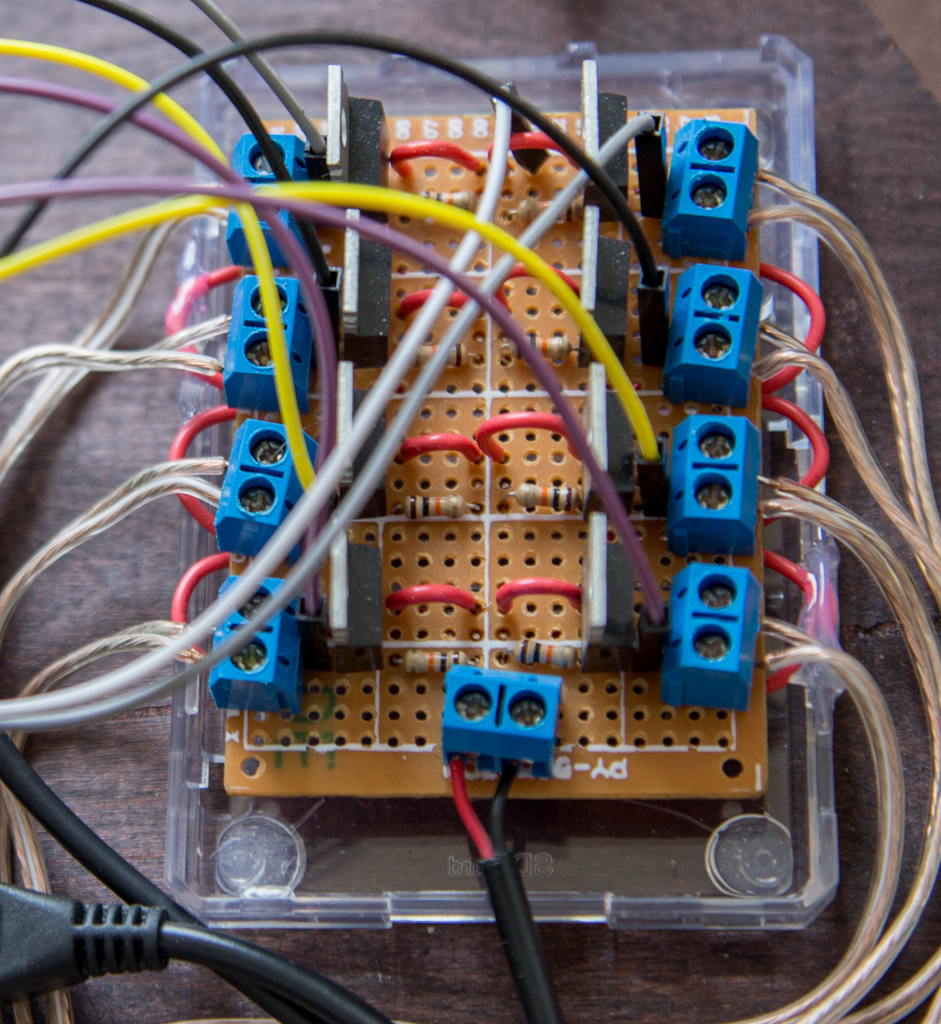
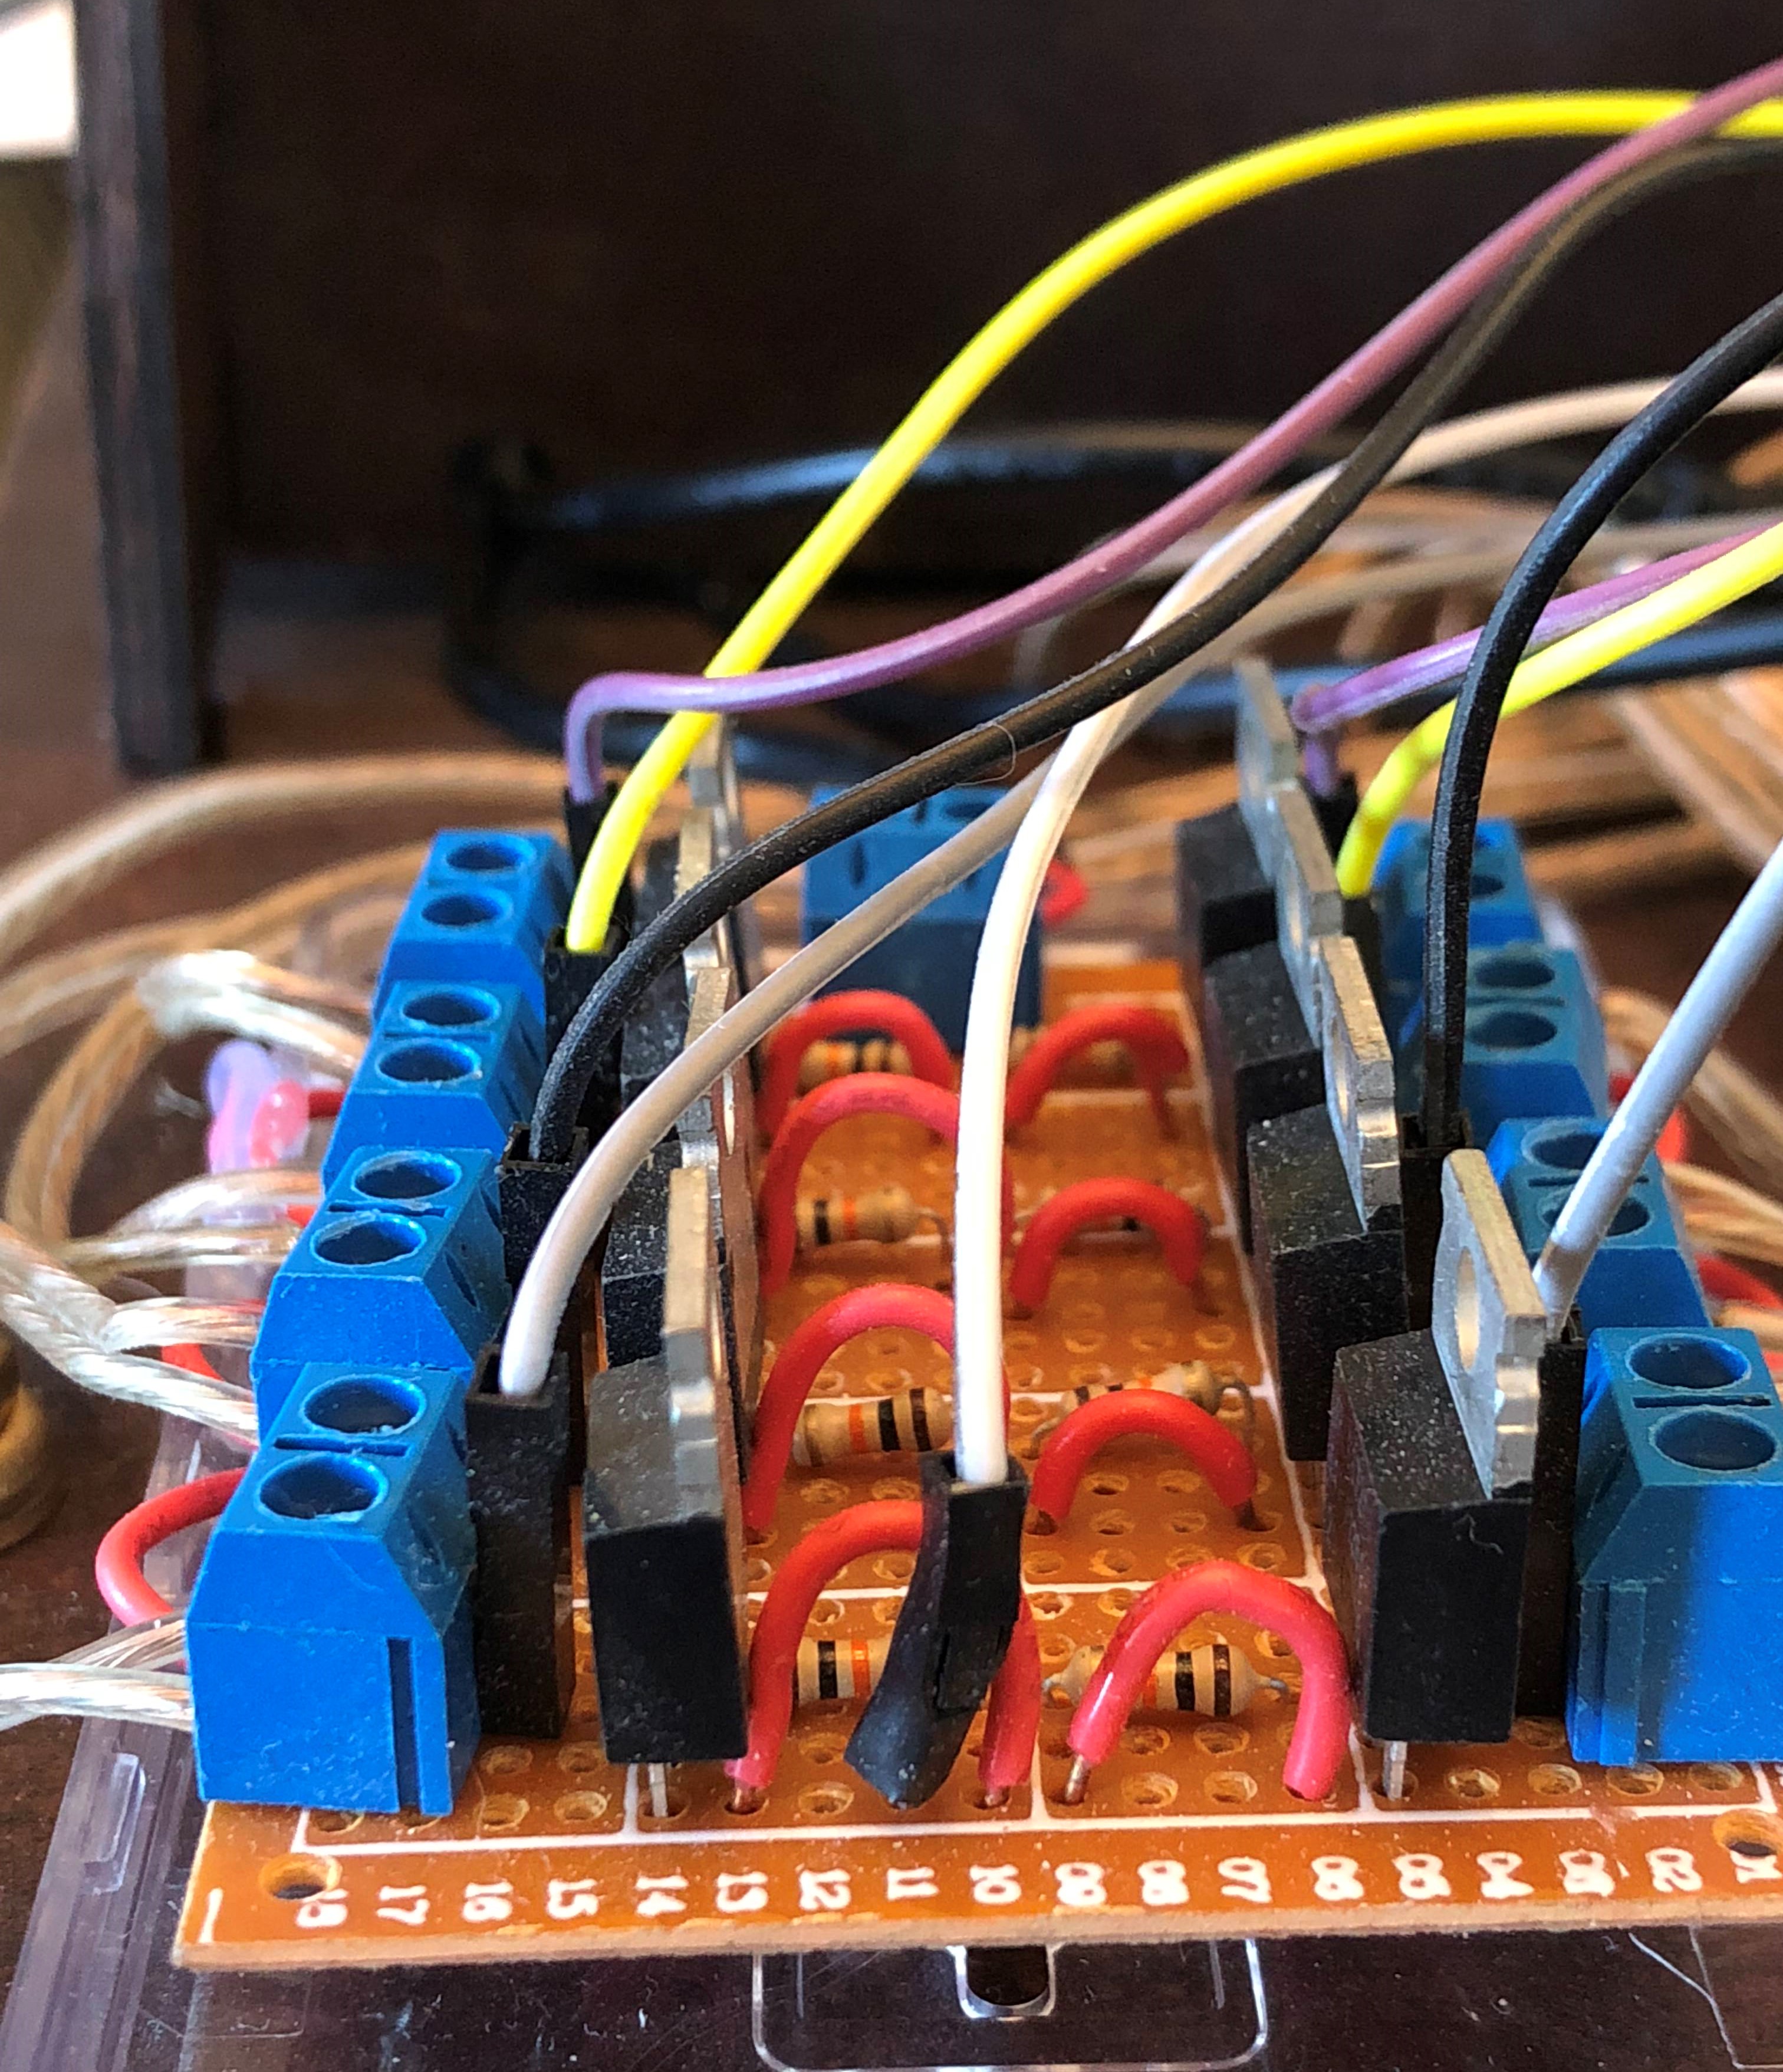
Step 1) Build the LED controlling circuit
- When I built the LED controlling circuit, I ran into LED controlling issues, as in, the circuit whose job it was to control which LED strip turned on, was not working.
- I started troubleshooting the chips and the wiring until I ended up re-drawing the circuit by hand at the most basic level, which fixed whatever issues I had before (whether it was because I missed a wire or a connection was loose, it didn’t matter because it was working).
Protip: Your life will be significantly easier if you test using a breadboard!
Step 2) Build a Real-time Clock Circuit
- I built a Real Time Clock circuit which enabled the system to know what date and time it was after a system restart or in case of power failure which is essential to the core functionality of the moon phase calculation.
- Following along with this tutorial made building the DS1307 RTC board a piece of cake!
- When I built this, I originally purchased the circuit kit from chicagodist.com for $9+shipping but now it looks like it is discontinued and easier to buy the circuit pre-built
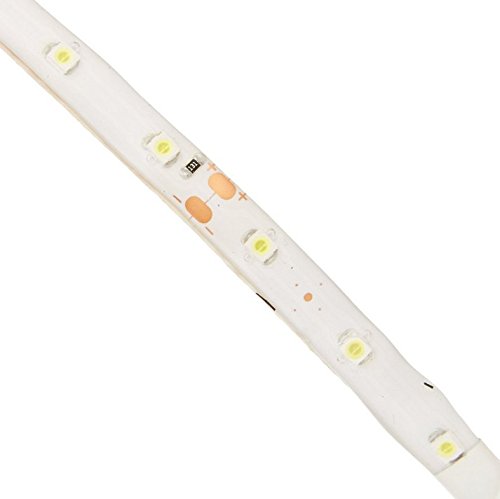
Step 3) Cut, wire, install, and test the LED strip lighting
- I first cut the LED strip lighting into 3 LED long pieces and made sure to cut along the lines.
- Once I had all 22 pieces cut, I exposed the copper pads on each strip’s edge using an x-acto knife so that I could wire and power them (I found that using an x-acto knife to cut the edges was a lot easier than using a soldering iron tip to melt them off).
- Once all of the edges were exposed, I made sure to tin all of the copper pads which made the process of soldering the 28 wires connecting the LEDs together much easier.
- After this was done, I tested all the LEDs using a breadboard by applying 12VDC directly and voila, it was lit!
Step 4) Add some pizazz to your project by adding an LCD screen to display the current Moon Phase along with the date of the next full moon
- This addition was my own doing (or undoing after all of the issues I ran into) which I felt was necessary or else this project would be nothing more than copying an instructable
- The two parts you will need are the Serial Enabled LCD screen here and the FT232RL USB to Serial Breakout board here which will allow the Raspberry Pi to “talk” to the screen
- The code snippets to enable this feature are:
#initialize LCD screen goodness
import serial #import Pyserial
serialport = serial.Serial('/dev/ttyUSB0',9600, timeout=1) #open serial communication
serialport.write('\xfe\x01') #clear screen
#Display moon related information on LCD
serialport.write(m.phase_text) #write the moon's phase
serialport.write('\xfe\xc0') #move cursor to start of 2nd line add 80(hex) to 64(dec) and convert to hex
if DateTime.today() > m.full_date: #if the date is past the full moon date, display the next next full moon
serialport.write('Full: ' + str(next_full_date)[:10]) #write first 10 characters of next_full_date
elif DateTime.today() < m.full_date: #else display the next full moon
serialport.write('Full: ' + str(m.full_date)[:10]) #write first 10 characters of full_date
[/vc_wp_text][/vc_column][/vc_row][vc_row full_width=”stretch_row_content_no_spaces”][vc_column][vc_wp_text]


 DS1307 breakout board kit")


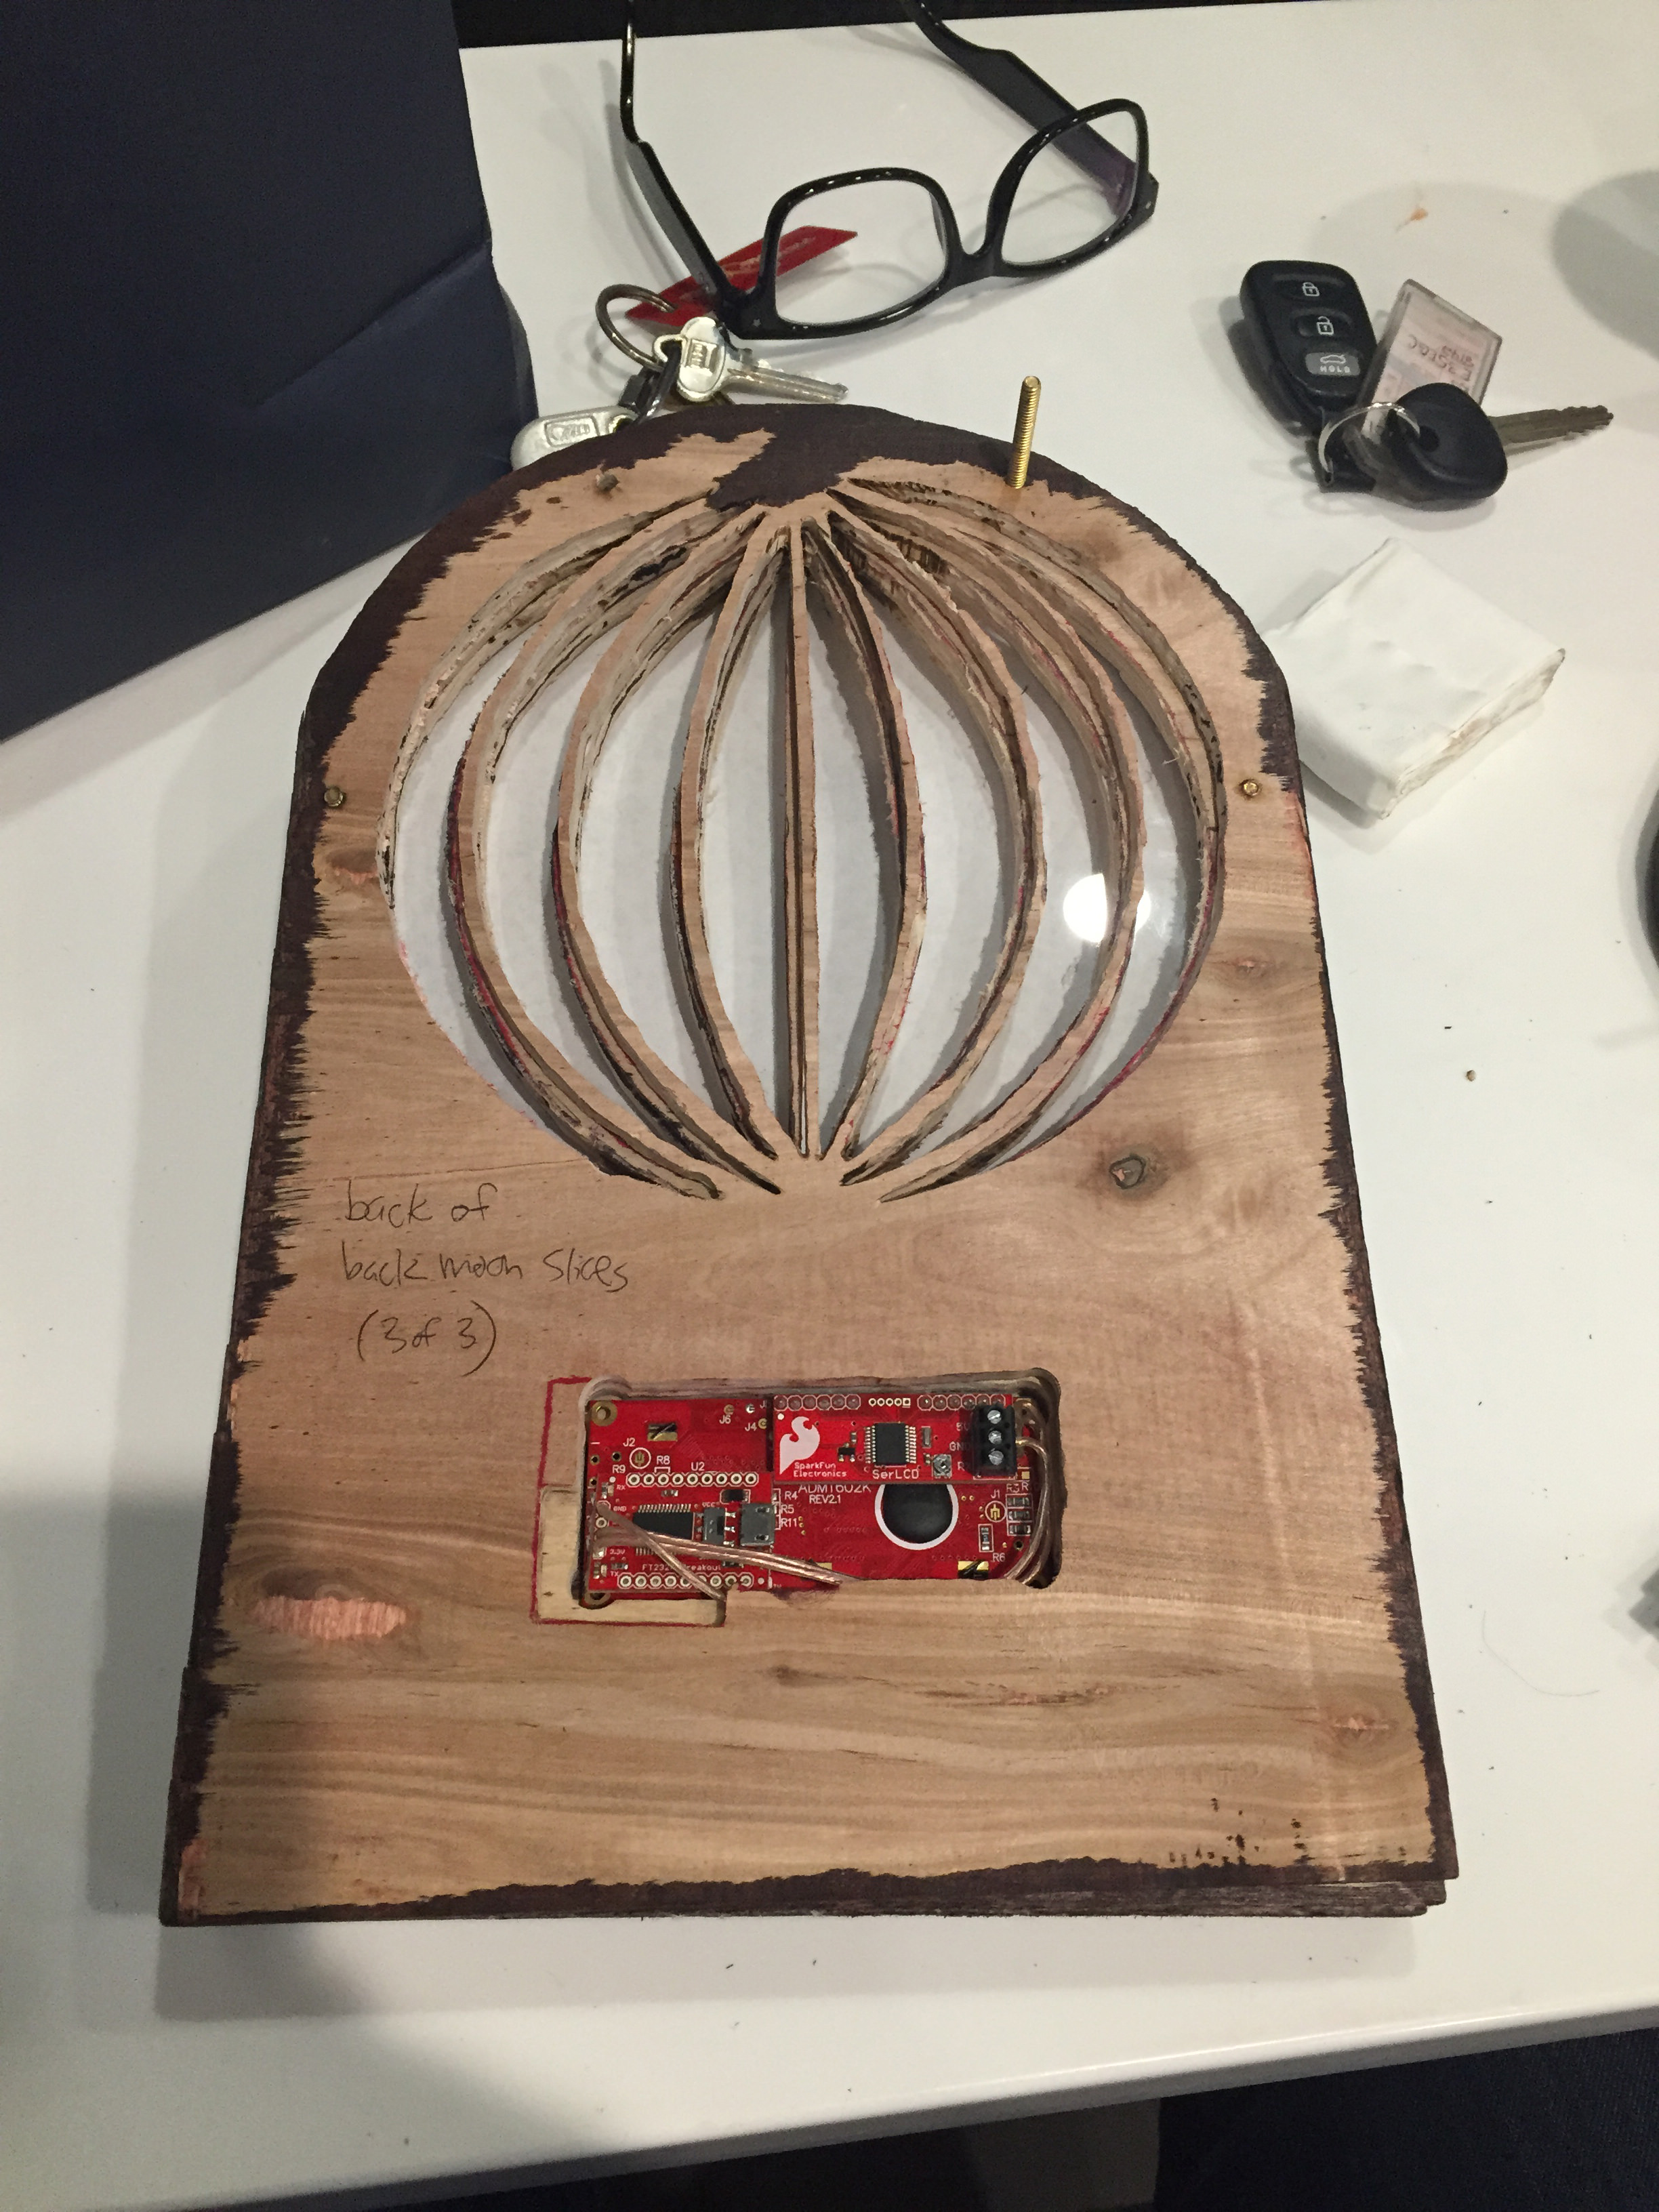
Part 3: Putting it all together
After gathering all of the [working] pieces to the puzzle, it was time to put it all together!
Step 1) Print out the highest quality moon graphic that you can find
Step 2) Cut out 2 circular pieces of plexiglass that will be used to sandwich/hold the moon graphic in place
NOTE: I had to use my dremel to cut some space around the circular opening to make room for the plexiglass pieces or else the wood layers would not be able to sit flush with each other
Step 3) Secure the plexiglass sandwich to the wood, in my case, I used trusty gaffer tape
Step 4) “Install” the LCD screen on the front wood layer
Step 5) Start to layer the rest of the wood pieces on top of the first one using a screw as the reference point
Step 6) Snake a micro-USB cable through to the FT232 Breakout board
Step 7) Insert the remaining screws and tighten the nuts using washers
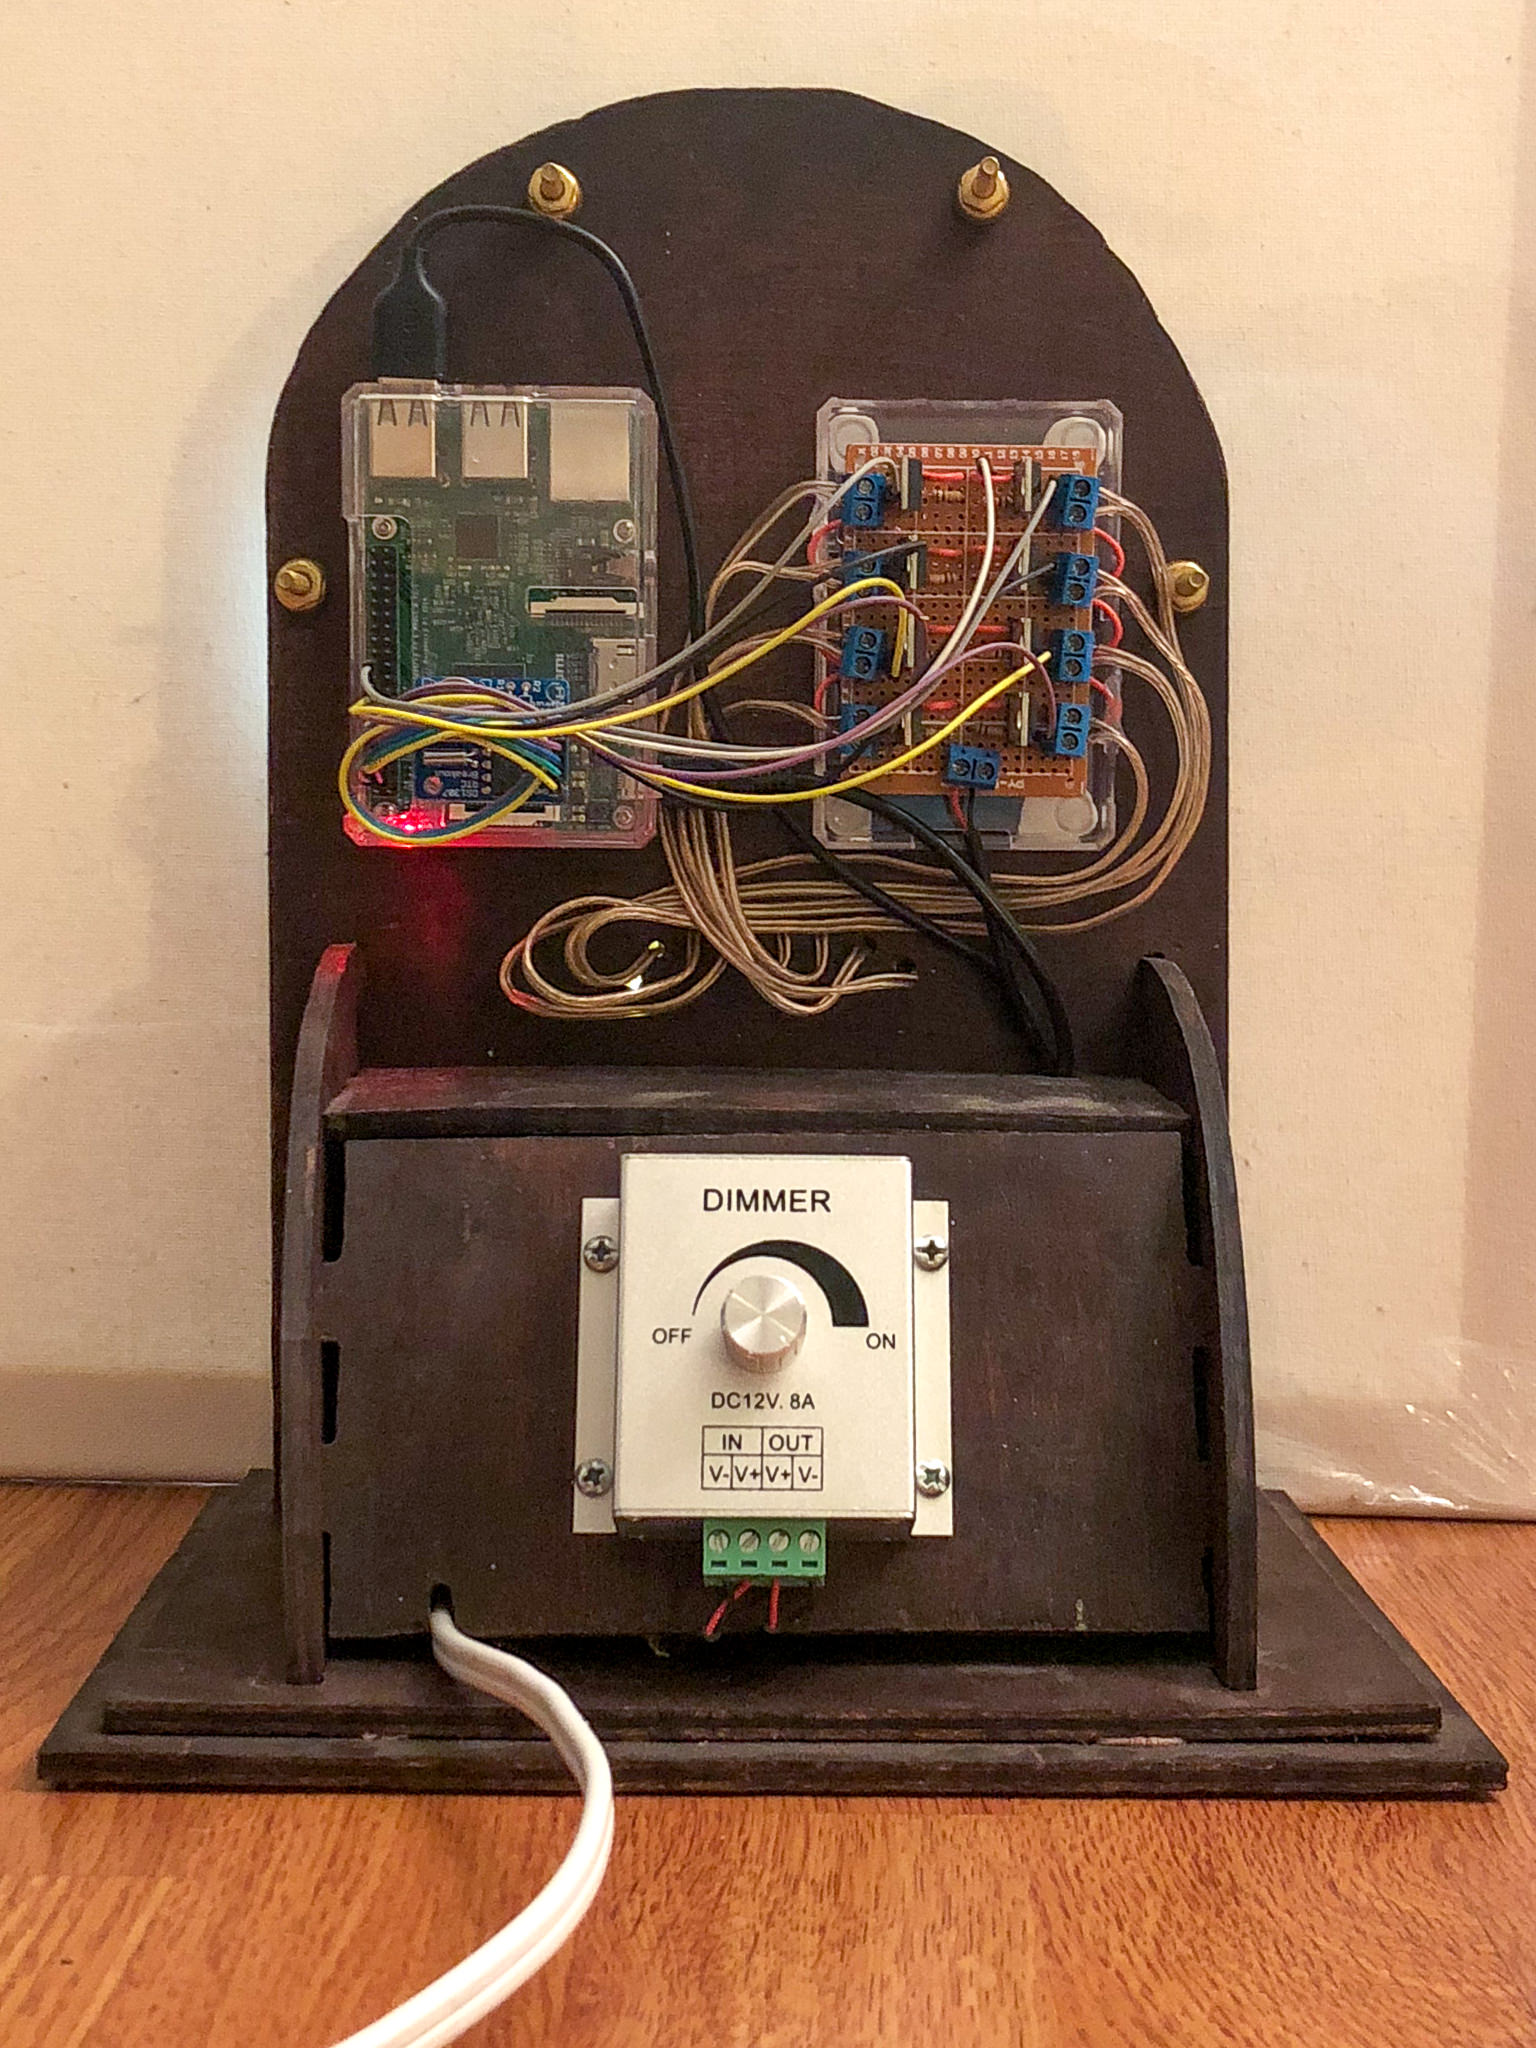
Step 8) Secure the Raspberry Pi case and the LED Controlling Circuit case to the back (I used a strong epoxy)
Step 9) Figure out a way to hide all of those pesky wires (including a 3 outlet extension cord allowing the device to be powered with only 1 plug)
Step 10) Put the finishing touches on the project, stand back, cross your fingers, close your eyes, and plug it in
Step 11) Marvel at your accomplishment
Step 12) Critique your imperfect project and make further adjustments at the dismay of your waiting girlfriend[/vc_column_text][/vc_column][/vc_row][vc_row full_width=”stretch_row_content_no_spaces”][vc_column][vc_wp_text]


Part 4: Troubleshooting + Making it “perfect”
After putting everything and turning it on, I noticed some imperfections with the project that overtime would possibly drive me nuts so I worked on fixing them.
One of the first issues I noticed was that using the “moonlight.py” program from the instructable incorrectly calculated the current moon phase, and if that part was wrong, then what was the whole point of the gift?? I started doing some research related to moon phase calculation written in python and stumbled across a stackoverflow question which led me to find a perfectly written program that did just that! It was fairly straight forward to get it working on the Raspberry Pi after running the command “sudo apt-get install python-egenix-mxdatetime”.
Once the Raspberry Pi was correctly calculating the current moon phase, I noticed that the LCD screen could use something that made it special and was more specific to my girlfriend, so I added some start-up text that is displayed when it is powered on. Following the instructions from here, here, and here, I was successfully able to program the LCD to display 2 lines on startup.
Now that the LCD screen had splash text, I wanted to show when the next full moon would be, you know, something that was actually useful. I reached out for some help from the author of the moon.py program, Kevin Turner, and he gave me the code to enable this feature.
After checking that the moon was displaying the correct phase and that the LCD screen was displaying the correct information, I thought I was finally finished! That was the case, until…a friend had the misfortune of having to sleep in the same room as the moon project and was tormented by the blindingly bright LEDs being blasted into his eyeballs. This was solved by installed a Dimmer Controller which allowed the LED strips to be dimmed (I spliced the Dimmer in between the 12VDC transformer that was powering the LED circuit).[/vc_column_text][/vc_column][/vc_row][vc_row][vc_column][vc_column_text]
Miscellaneous
It’s been almost 2 years since I finished the project and since then, the only thing that I needed to fix was to re-epoxy the Raspberry Pi and the LED Circuit boards on the back. Otherwise, everything has been working perfectly and always mimics the real moon.
Thinking back to when I was building, dremeling, soldering, cursing, researching, and creating, it is still immensely satisfying to look at the moon “clock” and know that I built that entirely by hand (and my motorized hand extension, a.k.a. the dremel) for someone that I deeply care for. Sure, I could have found somewhere in NYC that could CNC cut all of the plywood pieces perfectly with a very tight tolerance. Sure, I could have copied the instructables directions to a t and not add my own flair. But where is the fun frustrating satisfaction in that?
Anyway, a project like this can only give you so many birthday brownie points until they start to run out, so who knows what kind of birthday present project I will embark on next…[/vc_column_text][/vc_column][/vc_row][vc_row][vc_column][vc_column_text]
Resources
You can find the code I used to program the LCD “splash screen” here
You can find the code that was/is used to calculate the moon phase along with piping it to the LCD display here
As far as I remember with regards to getting it actually working and running, I needed to:
- copy the .py files to the Raspberry Pi
- chmod +x the files
-
run “sudo apt-get install python-egenix-mxdatetime”
- run “sudo apt-get install i2c-tools”
- add the moon.py file to crontab to boot on start up